Handle Authorization in React + Express (TypeScript) Application Using Role Based Access Control
Restricting pages and backend APIs by user role with Role Based Access Control across a React frontend and Express backend.
- #react
- #express
- #role-based-access-control
- #authorization
- #jwt-token
We can use Role Based Access Control (RBAC) when we need to restrict the users from accessing pages / backend APIs, based on their role (permission level). For this tutorial, you need to have an application which already handles user authentication using token-based authentication. This way, we’ll have a JWT token we can use to include and retrieve user roles.
If you don’t have an application to continue this tutorial, you can view my previous articles and create an application which uses React, TypeScript, Redux Toolkit, React Router V6 for the frontend, and Express, TypeScript, MongoDB for backend and databases.
For this tutorial, we’ll have 4 roles; Admin, Lead, Project Manager and User.
1. Authorization for Express backend
Create a constants.ts file under the src folder in your backend application and include below.
export enum Roles {
  Admin = "ADMIN",
  Lead = "LEAD",
  ProjectManager = "PROJECT_MANAGER",
  User = "USER",
}
Then we’ll update the User model with our new field; roles which will be an array in case a user has multiple roles. We’ll add the default role as USER, so that when a user registers, he’ll be assigned with USER role by default. (If the user role needs to be updated, that has to be done by an admin from a separate Settings page.) The User.ts file will be as below.
import mongoose, { Document, Schema } from "mongoose";
import bcrypt from "bcryptjs";
import { Roles } from "../constants";

export interface IUser extends Document {
  name: string;
  email: string;
  password: string;
  roles: string[];
  comparePassword: (enteredPassword: string) => boolean;
}

const userSchema = new Schema<IUser>({
  name: {
    type: String,
    required: true,
  },
  email: {
    type: String,
    required: true,
    unique: true,
  },
  password: {
    type: String,
    required: true,
  },
  roles: {
    type: [String],
    required: true,
    default: [Roles.User],
  },
});

userSchema.pre("save", async function (next) {
  if (!this.isModified("password")) {
    next();
  }

  const salt = await bcrypt.genSalt(10);
  this.password = await bcrypt.hash(this.password, salt);
});

userSchema.methods.comparePassword = async function (enteredPassword: string) {
  return await bcrypt.compare(enteredPassword, this.password);
};

const User = mongoose.model("User", userSchema);

export default User;
In the last tutorial, we defined the Request interface to include user information as well, let’s include roles to the list. Update the interface as below in the index.ts file.
interface UserBasicInfo {
  _id: string;
  email: string;
  roles: string[];
}

declare global {
  namespace Express {
    interface Request {
      user?: UserBasicInfo | null;
    }
  }
}
Currently, when a user tries to register / login, the user is created / user credentials are validated, and once it’s successful, we generate a JWT token and sends user data in the response body.
For the JWT token payload, we need to include user roles as well. Then, when a user sends a request to access a restricted resource, we can decode the token and retrieve the user roles and then decide whether we allow them to access / not.
For the response body we send back in login / register, we can include the user roles as well, so that we can restrict the page access or actions in the frontend application based on that.
Let’s update the userController.ts file as below.
import { Request, Response } from "express";
import User from "../models/User";
import { generateToken, clearToken } from "../utils/auth";
import {
  BadRequestError,
  AuthenticationError,
} from "../middleware/errorMiddleware";
import asyncHandler from "express-async-handler";

const registerUser = asyncHandler(async (req: Request, res: Response) => {
  const { name, email, password } = req.body;
  const userExists = await User.findOne({ email });

  if (userExists) {
    res.status(409).json({ message: "The email already exists" });
  }

  const user = await User.create({
    name,
    email,
    password,
  });

  if (user) {
    generateToken(res, {
      userId: user._id,
      userEmail: user.email,
      roles: user.roles,
    });
    res.status(201).json({
      id: user._id,
      name: user.name,
      email: user.email,
      roles: user.roles,
    });
  } else {
    throw new BadRequestError("An error occurred in registering the user");
  }
});

const authenticateUser = asyncHandler(async (req: Request, res: Response) => {
  const { email, password } = req.body;
  const user = await User.findOne({ email });

  if (user && (await user.comparePassword(password))) {
    generateToken(res, {
      userId: user._id,
      userEmail: user.email,
      roles: user.roles,
    });
    res.status(201).json({
      id: user._id,
      name: user.name,
      email: user.email,
      roles: user.roles,
    });
  } else {
    throw new AuthenticationError("User not found / password incorrect");
  }
});

const logoutUser = asyncHandler(async (req: Request, res: Response) => {
  clearToken(res);
  res.status(200).json({ message: "Successfully logged out" });
});

export { registerUser, authenticateUser, logoutUser };
Our generateToken() function also needs to be updated to include the new payload we’re sending.
import jwt from "jsonwebtoken";
import { Response } from "express";

interface TokenPayload {
  userId: string;
  userEmail: string;
  roles: string[];
}

const generateToken = (res: Response, payload: TokenPayload) => {
  const jwtSecret = process.env.JWT_SECRET || "";
  const token = jwt.sign(payload, jwtSecret, {
    expiresIn: "1h",
  });

  res.cookie("jwt", token, {
    httpOnly: true,
    secure: process.env.NODE_ENV !== "development",
    sameSite: "strict",
    maxAge: 60 * 60 * 1000,
  });
};

const clearToken = (res: Response) => {
  res.cookie("jwt", "", {
    httpOnly: true,
    expires: new Date(0),
  });
};

export { generateToken, clearToken };
When a user tries to access a restricted resource (users/:id to view profile information), we already use a middleware to verify user authentication. In this middleware, we attach user info to the request object, so that we can access them in controllers/ other middleware. I was retriving the user data from database, let’s use the data we decode from the token instead.
const authenticate = (req: Request, res: Response, next: NextFunction) => {
  try {
    let token = req.cookies.jwt;

    if (!token) {
      throw new AuthenticationError("Token not found");
    }

    const jwtSecret = process.env.JWT_SECRET || "";
    const decoded = jwt.verify(token, jwtSecret) as JwtPayload;

    if (!decoded || !decoded.userId || !decoded.userEmail) {
      throw new AuthenticationError("User not found");
    }

    const { userId, userEmail, roles } = decoded;

    req.user = { _id: userId, email: userEmail, roles };
    next();
  } catch (e) {
    throw new AuthenticationError("Invalid token");
  }
};
Now we need a middleware to authorize the user, to check if he can access the resource. Now, different routes have different access levels, eg: some should only be accessible for Admin roles, where in other cases, either Admin or User roles can access the routes. Therefore we can write a common middleware as below.
const authorize = (allowedRoles: string[]) => {
  return (req: Request, res: Response, next: NextFunction) => {
    const userRoles = req.user?.roles;

    if (
      !userRoles ||
      !userRoles.some((role: string) => allowedRoles.includes(role))
    ) {
      return res.status(403).json({ message: "Access denied" });
    }

    next();
  };
};
If there are no user roles or if the user roles doesn’t have any of the allowed roles, we’ll return a 403.
In order to demonstrate our feature, let’s create another route as /users where we’re retrieving a list of all the users. It should only be accessible by the Admin. Update the userController.ts file as below.
import { Request, Response } from "express";
import User from "../models/User";
import { BadRequestError } from "../middleware/errorMiddleware";
import asyncHandler from "express-async-handler";

const getUser = asyncHandler(async (req: Request, res: Response) => {
  const userId = req.user?._id;
  const user = await User.findById(userId, "name email");

  if (!user) {
    throw new BadRequestError("User not available");
  }

  res.status(200).json(user);
});

const getUsers = asyncHandler(async (req: Request, res: Response) => {
  const users = await User.find({}, "name email");

  res.status(200).json(
    users.map((user) => {
      return { id: user._id, name: user.name, email: user.email };
    })
  );
});

export { getUser, getUsers };
Now we can update our routes to use the authorize middleware we created. Update the userRouter.ts as below.
import express from "express";
import { getUser, getUsers } from "../controllers/userController";
import { authorize } from "../middleware/authMiddleware";
import { Roles } from "../constants";

const router = express.Router();

router.get(
  "/:id",
  authorize([Roles.User, Roles.ProjectManager, Roles.Lead, Roles.Admin]),
  getUser
);

router.get("/", authorize([Roles.Admin]), getUsers);

export default router;
That’s it for the backend. Let’s move to frontend.
2. Authorization for React application
We’ll update our frontend routes / page access based on the user roles. Note that frontend restriction “only” is not enough, we must protect our routes from the backend as above.
We’re using Redux Toolkit to manage our app state. Let’s update our authSlice.ts UserBasicInfo type (the info we use to validate user) to save the roles we now receive from the backend.
type UserBasicInfo = {
  id: string;
  name: string;
  email: string;
  roles: string[];
};
Let’s include the list of Roles to the constants.ts file. I have included ErrorResponse type as well to the file, since we use it everywhere.
export type ErrorResponse = {
  message: string;
};

export enum Roles {
  Admin = "ADMIN",
  Lead = "LEAD",
  ProjectManager = "PROJECT_MANAGER",
  User = "USER",
}
Since I need to demonstrate the feature we’re implementing, I’ll create another page as UserSettings.tsx, where only Admins should have access to. We’re retrieving the list of all users and show them in the page. First, let’s create the userSlice.ts to handle the state.
import { PayloadAction, createAsyncThunk, createSlice } from "@reduxjs/toolkit";
import axiosInstance from "../api/axiosInstance";
import { AxiosError } from "axios";
import { ErrorResponse } from "../constants";

type UserInfo = {
  id: string;
  name: string;
  email: string;
  roles: string[];
};

type UserApiState = {
  users: UserInfo[];
  status: "idle" | "loading" | "failed";
  error: string | null;
};

const initialState: UserApiState = {
  users: [],
  status: "idle",
  error: null,
};

export const getUsers = createAsyncThunk(
  "users/getAll",
  async (_, { rejectWithValue }) => {
    try {
      const response = await axiosInstance.get("/users");
      return response.data;
    } catch (error) {
      if (error instanceof AxiosError && error.response) {
        const errorResponse = error.response.data;

        return rejectWithValue(errorResponse);
      }

      throw error;
    }
  }
);

const userSlice = createSlice({
  name: "user",
  initialState,
  reducers: {},
  extraReducers: (builder) => {
    builder
      .addCase(getUsers.pending, (state) => {
        state.status = "loading";
        state.error = null;
      })
      .addCase(
        getUsers.fulfilled,
        (state, action: PayloadAction<UserInfo[]>) => {
          state.status = "idle";
          state.users = action.payload;
        }
      )
      .addCase(getUsers.rejected, (state, action) => {
        state.status = "failed";
        if (action.payload) {
          state.error =
            (action.payload as ErrorResponse).message ||
            "Retrieving users failed";
        } else {
          state.error = action.error.message || "Retrieving users failed";
        }
      });
  },
});

export default userSlice.reducer;
Add the slice reducer to the store.ts file.
import { configureStore } from "@reduxjs/toolkit";
import authReducer from "./slices/authSlice";
import userReducer from "./slices/userSlice";
import notificationReducer from "./slices/notificationSlice";
import { axiosMiddleware } from "./api/middleware";

const store = configureStore({
  reducer: {
    auth: authReducer,
    users: userReducer,
    notification: notificationReducer,
  },
  middleware: (getDefaultMiddleware) =>
    getDefaultMiddleware().concat(axiosMiddleware),
});

export type RootState = ReturnType<typeof store.getState>;
export type AppDispatch = typeof store.dispatch;

export default store;
Under the pages folder, create following files.
UserSettings.tsx as a Admin-only access page
import React, { useEffect } from "react";
import { useAppDispatch, useAppSelector } from "../hooks/redux-hooks";
import { getUsers } from "../slices/userSlice";

const UserSettings = () => {
  const dispatch = useAppDispatch();
  const users = useAppSelector((state) => state.users.users);

  useEffect(() => {
    dispatch(getUsers());
  }, []);

  return (
    <>
      <h1>User Settings</h1>
      {users.map((user) => (
        <div>
          <h4>User Email: </h4>
          {user.name}
        </div>
      ))}
    </>
  );
};

export default UserSettings;
AccessDenied.tsx file to render if the user tries to access a page he doesn’t have access to.
import React from "react";

const AccessDenied = () => {
  return <div>Access Denied</div>;
};

export default AccessDenied;
NotFound.tsx file since we don’t have a page yet to show, in case the user tries to enter a route that doesn’t exist. (not related to authorization)
import React from "react";

const NotFound = () => {
  return <div>Not Found</div>;
};

export default NotFound;
Our App.tsx file is as below for the moment.
import React from "react";
import { Routes, Route } from "react-router-dom";
import Home from "./pages/Home";
import Login from "./pages/Login";
import Register from "./pages/Register";
import DefaultLayout from "./layouts/DefaultLayout";
import ProtectedLayout from "./layouts/ProtectedLayout";
import NotificationBar from "./components/notification/NotificationBar";

function App() {
  return (
    <>
      <NotificationBar />
      <Routes>
        <Route element={<DefaultLayout />}>
          <Route path="/login" element={<Login />} />
          <Route path="/register" element={<Register />} />
        </Route>
        <Route element={<ProtectedLayout />}>
          <Route path="/" element={<Home />} />
        </Route>
      </Routes>
    </>
  );
}

export default App;
All the protected routes should be wrapped in a route with ProtectedLayout as the layout. Therefore we can handle the access control inside the ProtectedLayout component. Update the ProtectedLayout.tsx as below.
import React from "react";
import { Link, Outlet } from "react-router-dom";
import { useAppDispatch, useAppSelector } from "../hooks/redux-hooks";
import { Navigate } from "react-router-dom";
import AccessDenied from "../pages/AccessDenied";

type ProtectedLayoutType = {
  allowedRoles: string[];
};

const ProtectedLayout = ({ allowedRoles }: ProtectedLayoutType) => {
  const basicUserInfo = useAppSelector((state) => state.auth.basicUserInfo);

  if (!basicUserInfo) {
    return <Navigate replace to={"/login"} />;
  }

  if (
    !basicUserInfo.roles ||
    !basicUserInfo.roles.some((role: string) => allowedRoles.includes(role))
  ) {
    return <AccessDenied />;
  }

  return (
    <>
      <Outlet />
    </>
  );
};

export default ProtectedLayout;
Now let’s update our App.tsx as below, defining allowed roles for each of the protected route.
import React from "react";
import { Routes, Route } from "react-router-dom";
import Home from "./pages/Home";
import Login from "./pages/Login";
import Register from "./pages/Register";
import UserSettings from "./pages/UserSettings";
import NotFound from "./pages/NotFound";
import DefaultLayout from "./layouts/DefaultLayout";
import ProtectedLayout from "./layouts/ProtectedLayout";
import NotificationBar from "./components/notification/NotificationBar";
import { Roles } from "./constants";

function App() {
  return (
    <>
      <NotificationBar />
      <Routes>
        <Route element={<DefaultLayout />}>
          <Route path="/login" element={<Login />} />
          <Route path="/register" element={<Register />} />
        </Route>
        <Route
          element={
            <ProtectedLayout
              allowedRoles={[
                Roles.User,
                Roles.ProjectManager,
                Roles.Lead,
                Roles.Admin,
              ]}
            />
          }
        >
          <Route path="/" element={<Home />} />
        </Route>
        <Route element={<ProtectedLayout allowedRoles={[Roles.Admin]} />}>
          <Route path="/user-settings" element={<UserSettings />} />
        </Route>
        <Route path="*" element={<NotFound />} />
      </Routes>
    </>
  );
}

export default App;
That’s it for the access control for the frontend application.
In order to test the application, you’ll have to logout first, if you were logged in. Else, you can clear the local storage and try to login / register.
If you already have a user, login still works even though he doesn’t have any roles saved for his record in the database. This is since, Mongoose assign default value we set for the roles, if the user doesn’t have any in the database level. Therefore login should work.
If you try to register a new user, his roles will be saved to the database as [“USER”] by default.
You should be able to visit the homepage (“/”) since it’s allowed for all roles. Now, if you type /user-settings in the address bar url, you’ll only see AccessDenied page, since you don’t have ADMIN role.
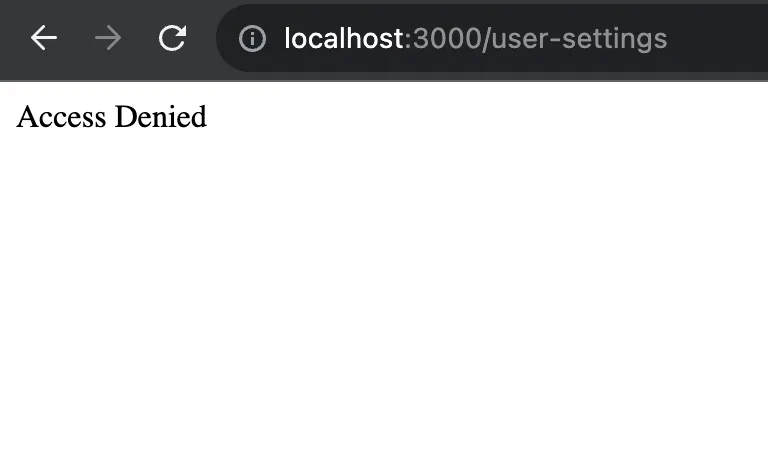
Access Denied for users with no required roles
You can check if all the features are working by changing access levels in frontend and backend to handle different cases. You must verify that, even if a request to retrieve user list is initiated in the application, it is failed with a 403 status code, if you don’t have the required roles.
Visit frontend codebase and backend codebase to view the full implementation up to now.
Follow me and stay tuned! If you have any questions, let me know in the comments!
Previous Steps
Create a React application with Login / Register pages
Create a simple React app (TypeScript) with Login / Register pages using create-react-app
Manage your React application state using Redux Toolkit
Manage your React (TypeScript) application state using Redux Toolkit
Manage notifications in your React application
Handle notifications in your React application (TypeScript) using Redux toolkit and use a custom…
Create an Express backend application to handle authentication
Create a backend application using Express (TypeScript) and handle authentication
Originally published on Medium.